Saturday, January 11 2014
For thousands of years, humans have been prospecting, mining and refining metals. The invention of smelting was a true technological advancement for mankind and marked the end of the Stone Age. Working with native metals such as copper, silver, gold, lead, and tin came first. These metals have fairly low melting points and the ability to cast and forge them was revolutionary. The Bronze Age was born when tin was mixed with copper, creating the first alloy and better weapons of war. Wednesday, January 01 2014
Mark your calendars to attend a Gold Show in 2014! Gold and Treasure Expos sponsored by the Gold Prospectors Association of America (GPAA) are open to the public. Admission is $5 for adults; free for kids under 12. Each paid attendee will receive a 14 inch GPAA Gold Catcher Gold Pan and a copy of Gold Prospectors, the GPAA’s national magazine. Also, the first 100 paid attendees will receive a free vial of real gold!
2110 Frear St. (541) 957-7010 Lancaster, CA 93536 (661) 206-0427 9777 Las Vegas Blvd. South Las Vegas, NV (866) 796-7111 110 9th Ave. SW Puyallup, WA 98371 (253) 845-1771 ALSO MARK YOUR CALENDARS for the... 2014 Gold Prospecting & Mining Summit After a hiatus last year, this Summit returns to the Eldorado County Fairgrounds and features 80 booths with the latest in prospecting and mining equipment. Sponsored by ICMJ's Prospecting and Mining Journal, a team of writers and experts will be on hand to provide you with the information you need to succeed at gold prospecting and gold mining. Lecture topics include:
And back by popular demand... Two Additional Days of Hands-on Training! Admission is $5 at the door. Fairgrounds charges $5 parking per day. No pre-registration required for the Mining Summit, but pre- registration is a good idea for the Hands-on Training classes. Sunday, December 01 2013
Dry washers are like highbankers except they do not use water to recover gold. While wet processing is nearly always faster and more efficient, especially for fine gold, dry washers are the best tool for recovering gold nuggets, pickers, and flakes from dry materials in the desert or other areas where water is not plentiful. Keep these tips and tricks in mind when using a dry washer: • Double-check all the "throw away" rocks. Scanning them with a metal detector is a great way to ensure you're not tossing aside gold-laden rocks. Also, don't assume old tailings piles have been totally worked out. This is another time to use a metal detector because ordinary rocks could be laced with gold and completely over-looked by earlier prospectors.
Thursday, November 14 2013
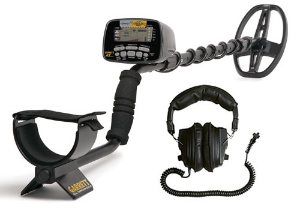
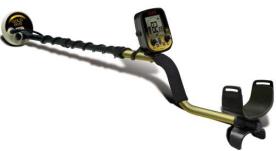
If you've been prospecting for gold using a pan, sluice, highbanker or other traditional piece of equipment, there's another tool you may want to consider— a metal detector. Gold detectors are not necessarily higher in cost than an all-purpose detector, but they are built with a higher sensitivity to pinpointing pieces of gold, and have better ground balancing and discrimination abilities.
PI (pulse induction) detectors work a bit differently by putting magnetic field energy into the ground and then switching off and waiting a very short period before they start to look for a response. This makes them better at handling ground mineralization than a VLF detector because during that short delay the magnetic response of iron trash minerals that you don't want to find dies out, but the signal from tiny bits of buried gold does, too. VLF detectors are more sensitive to finding the smallest bits of gold, but do not as easily cancel out ground mineralization. Friday, November 01 2013
At first glance, metal detecting seems like the least demanding form of prospecting for gold. But it has its share of challenges, too, just like sluicing, drywashing, or panning by hand. Whether you've been swinging a metal detector for years, or just purchased your first machine, there might be a few things you could do to increase your chances of uncovering a piece of buried gold. Nugget of News Blog Sunday, October 27 2013
There are basically two kinds of potholes in bedrock channels -- vertical and lateral. Vertical potholes formed on rock surfaces that were at one time part of the channel's rock floor. These potholes are now exposed because that portion of the channel has been raised above the active river or is just below the surface, making them pretty easy for you to spot. Lateral potholes are cut into the rocky sides of channels or into sides of rocks that stuck out of the channel as mini-islands. Lateral potholes formed near the river's surface, where rock, water and air meet, instead of at the river bottom.
In the same way that tree roots, huge logs, and big boulders can catch gold as it is moved downstream by fast-moving water, rock pot holes are natural gold catchers, too. Rocks and debris can settle in the pot holes and act as a "cap" for bits of gold that are also washed into the depression. Often the cap will completely hide gold that is underneath it... that is until some lucky prospector like you comes along, knowing where to look, and moves the cap out of the way to expose the gold. Eureka! Thursday, October 24 2013
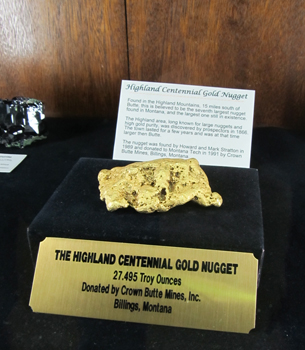
There is probably no more appropriate place for a mineral museum than in Butte, Montana, better known as the Richest Hill on Earth. The state itself is nicknamed The Treasure State, so with monikers like those, you know you’re going to see a lot of prized specimens! Situated on the Montana Tech Campus, the Mi One of the highlights in the Mineral Museum is the “Highland Centennial Gold Nugget” weighing 27.5 troy ounces. The nugget got its name because it was found in the Highland Mountains south of Butte in 1989. The nugget is believed to be the 7th largest gold nugget found in Montana. A 400-pound smoky quartz crystal, referred to as “Big Daddy,” was unearthed just east of Butte. Because of Montana’s long tradition of mining, you’ll see impressive examples of colorful bornite, garnet, azurite, agate, sapphires, and more. If you want to take a sample home, you’ll find small pieces for sale in the gift shop. There’s also a good selection of books relating to minerals. Don’t miss the museum’s display of fluorescent minerals. Cases are in a separate room and are illuminated in both long and short wavelength ultraviolet light. It’s amazing how ordinary-looking minerals radiate extraordinary vibrant shades of pink, orange, and blue when exposed to ultraviolet light. You won’t believe how halite (also known as salt) changes from white to red. Kids especially think it’s just plain fun being in the Fluorescent Room surrounded by a crazy glowing rainbow of rocks! The Montana Bureau of Mines and Geology Earthquake Studies office is also located in the Mineral Museum. Watch the seismic activity from Montana and around the world as it is recorded and printed on the seismographs. IF YOU GO Montana Tech Campus 1300 West Park St. • Butte, MT 59701 • (406) 496-4414
Tuesday, October 15 2013
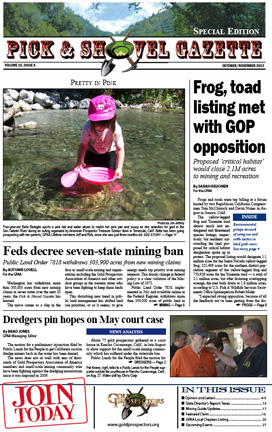
This disturbing new trend in public land management has shifted land use priorities, or so it seems, to give energy needs top priority over mining interests. This drastic change in federal policy is a clear violation of the Mining Law of 1872. Public Land Order 7818, implemented in July and available online in the Federal Register, withdraws more than 300,000 acres of public land in Arizona, California, Colorado, Nevada, New Mexico and Utah from new mining claims for the next 20 years. In addition to stopping all new permits, this withdrawal will restrict mining claims in multiple regions in an effort to create Solar Energy Zones in regions that have been surveyed and identified by the federal government as prime areas for utility-scale solar development. Withdrawal from mineral entry has been used in the past to create national parks and military bases, but this is the first time a withdrawal is being implemented to encourage green energy development. This order, created by Secretary of the Interior Sally Jewell, sets the pace for the Obama administration’s energy and land use policy for the next few years. The Obama administration has committed to clean energy, and Bureau of Land Management Principal Deputy Director Neil Kornze recently stated in a news release that “The Public Land Order protects the integrity of the Solar Energy Zones and helps us meet President Obama’s goal of green-lighting enough public lands to power more than 6 million homes by 2020.” The Interior Department currently estimates that projects developed in the new SEZs could power 1.8 million homes, if they are successfully implemented. President Barack Obama has promised to streamline the process for solar development in SEZs, however there are still several barriers between the implementation of PLO 7818 and the actual creation of energy generating utility-sized solar projects, according to the land rights group, Public Lands for the People. All of the solar plants will have to pass through a vigorous environmental assessment which will culminate in an Environmental Impact Statement, showing that placing solar farms in these regions will not harm any critical ecosystems or species, said PLP President Jerry Hobbs. The projects themselves will require new right-ofways and, in addition to generating electricity, the companies will also have to build an infrastructure which can transmit the new electricity to nearby communities. The process will be long and arduous and, in the meantime, the land will remain closed, he said. This is a brief excerpt from just one of the interesting and informative articles found in the October/November 2013 Pick & Shovel Gazette, published by GPAA. Download the full 28-page issue for free! Tuesday, October 01 2013
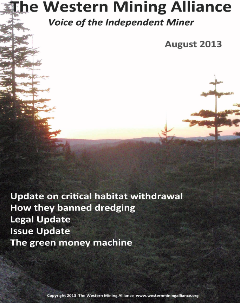
Whether you live in California and want to fully understand how your dredging rights were banned beginning several years ago, or live elsewhere and hear the story so you can prevent it from happening in your state, the following exerpt from the Western Mining Alliance newsletter explains the history of suction dredging, how the California ban was put into effect, and about the Coho Salmon's role in all this... How They Banned Dredging It’s interesting to deconstruct how the dredging ban came about. It’s a good study in how the environmental groups, with the support of the government regulators, used fabricated information to declare an emergency; labeled suction dredgers as destructive to the environment and convinced the State to spend millions of dollars to ban dredging and then to pursue this ban in court. To fight and win this dredging ban we must first understand how they succeeded in banning dredging. By “they” we mean the coalition of environmentalists and government regulators acting in concert to defy Congress and your Constitutional rights. Suction dredging began in the 1950’s. The advent of underwater breathing apparatus by Jaques Cousteau in the 1940’s was quickly adopted by placer miners as a means to reach areas previously passed over by miners. The rivers had been relatively untouched by miners because of the difficulty working underwater. The new ability to work the bottoms of rivers led to the quick expansion of suction dredging throughout the State of California and western rivers. In the 1950’s suction dredging was completely unregulated. Regulation began in 1961 when the California legislature passed SB1549 which was focused on the effects of suction dredging on salmon. The first dredging regulations were published in 1962 and the Department began issuing permits in 1962, however, the possession of a permit wasn’t mandatory. The dredging regulations were the result of a study commissioned by the Department of Fish and Game in 1960 which indicated some restrictions were required to protect spawning salmon. The report also recommended the maximum size of the suction dredge be restricted to a 8” nozzle size. From 1960 to 1994 dredging and dredging regulations remained largely unchanged but in 1994 the Department completed their first environmental impact report which resulted in further restrictions on locations, times and equipment and made the possession of a permit mandatory. An environmental impact report is required by the California Environmental Quality Act (CEQA) for all projects after 1973. Suction dredging was a project subject to permitting prior to 1973. By the law it was exempt from CEQA. The time to fight CEQA was 1993 but there were few of us that had heard of or understood CEQA to the degree we do today. Regardless, by the law, suction dredging is exempt from CEQA and there are sufficient court case rulings that affirm this. The miners grudgingly accepted the new regulations and within two years the Department of Fish and Game was already in the process of creating a new EIR and a new set of regulations. Once the CEQA door was opened and the environmental groups realized they could use their favorite tool to ban dredgers from the rivers they began their assault on dredging. An organization of miners, including Public Lands for the People, challenged the Department over this new effort and the Department dropped the new EIR and left the 1994 regulations intact. The environmentalists, knew suction dredgers were an easy target. As opposed to large businesses, and industries with coalitions and lawyers, we were largely undefended. Being largely solitary operators focused on our efforts to recover gold we didn’t understand CEQA, nor did we care to. While we were busy with our heads down in the river, the environmentalists were petitioning the Department to ban suction dredging and to conduct a new EIR. Click here to download the 21-page .pdf. You will find the full article on the dredging ban on pages 13-15, but with so much good information, you'll want to read every page.
Sunday, September 01 2013
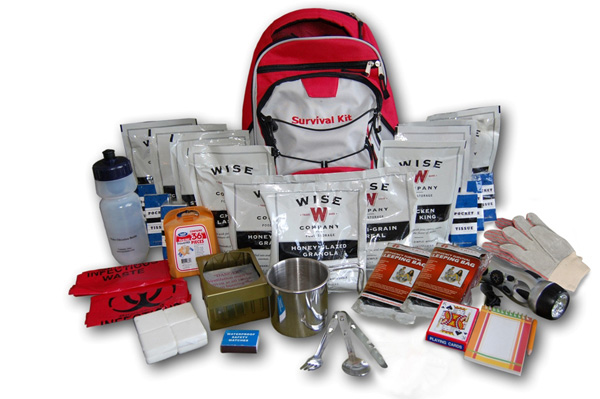
How Prepared Are You and Your Family? Whether it's a Severe Recession, Flood, Earthquake, Hurricane, or complete End of the World as we know it, each of us MUST be PERSONALLY PREPARED to "weather-the-storm" — and that means kids too. When crisis strikes, (or you see it on the six o'clock news) the time to prepare is over. Sort of like trying to buy insurance when the house is on fire. NOW is the time to SERIOUSLY REVIEW your preparedness supplies while time is on your side. Don't delay, but do involve your children in your prepping plans. Experts know that preparing kids ahead of time and helping them feel like part of the plan is extremely important to their health and well-being. One of the wisest steps toward emergency preparedness you'll ever make is to have long storing food reserves on hand— enough for 2 to 6 weeks (a 4 to 12 month reserve would even be better). Food-related problems are averted if kids are already acclimated to freeze-dried food in advance. Introduce foods to your children BEFORE emergencies so there are no picky-eater meltdowns at a critical time. Here are some tips:
Emergency food supplies are not only a good idea at home, but are ideal for long-term storage at your hooch when you're out gold prospecting, or in a family cabin you might only use during hunting season or on weekends during the summer. TV shows like Doomsday Preppers might seem extreme, but the principles of being prepared are mainstream and very sensible. And what better way to prepare than to make sure you have emergency food in reserve "just in case." |
|
Nugget of News Blog |



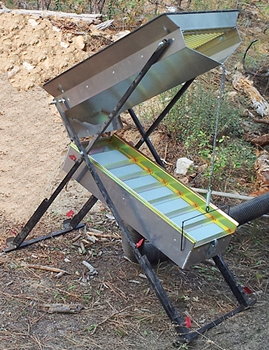 Drywashers are operated by shoveling gold-bearing gravels into an upper box which is covered with a screen. The larger rocks that are too big to pass through the screen slide off. Gravel small enough to go through is fed down into the lower gold recovery box, which is an inclined trough with cross riffles much like a sluice. The bottom of the recovery box consists of a thin, light-weight porous cloth. Beneath the riffle box is a blower that pulses air up through the cloth. The vibrations and air flow, combined with the shaking and classifying action of the dry washer allows the gold to settle to the bottom where it is captured in the riffles.
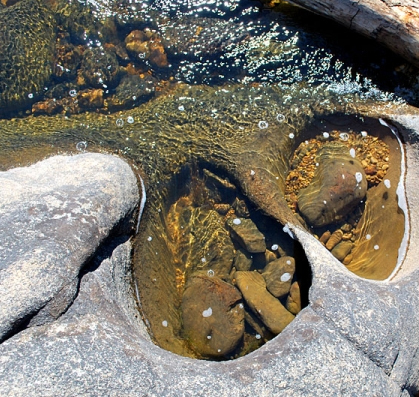 When you think about pot holes, you probably picture annoying driving hazards in the middle of the road that you try to avoid at all costs. That hole in the asphalt can cause a flat tire and help throw your car's alignment out of whack! But a pot hole in a rock that's located in a gold-bearing stream or river is something you DON'T want to steer clear of the next time you're out prospecting.