Thursday, January 30 2020
Anyone who prospects for gold knows how elusive it can be. Even when you’re for certain on “good ground,” you can end the day with not much to show for your efforts. On the other hand, you may have a really great day and recover some of the shiny stuff, only to return to the same spot at a later date and find nothing. Often, the amount of gold you recover changes when you use a different piece of equipment or a different accessory. Sometimes it’s the weather that exposes or releases gold after a flood or storm. The environment can change, but sometimes the positive difference can be new places to look for gold. Besides hiding in the usual places in streams and on dry land— in crevices, behind boulders, in the roots of plants and trees, in tailings piles — have you ever considered looking for gold in MOSS? Yes, the kind of ordinary moss that thrives in wet conditions! Mosses are small flowerless plants that usually grow in dense green clumps in shady moist places. That might be the forest floor, or on trees and rocks along the banks of a waterway. Moss is seedless and only grows roots shallow enough to attach itself to surfaces where it will thrive. Moss doesn’t have a root like a flower has, but it does have root-like structures that attach it to the host rock. These structures are known as rhizoids. Instead of sucking up moisture through the roots, moss collects rain and stream water that runs over top of them. It may also collect fine gold in the same way. If you’ve visited a particular stream at various times of the year, you know that water levels can vary greatly. Sometimes water completely covers mossy rocks that are along the banks, other times when the water level is low, the moss is exposed and dries out in the sun. Have you ever considered processing that ordinary moss for fine gold? It doesn’t sound too crazy when you think about gold being heavier than water and how it hides under boulders and rocks. So why couldn’t fine gold collect in moss as well? The next time you see moss growing along a gold-bearing waterway, try processing that moss (and all the dirt and sand and — hopefully — GOLD) that is mixed in with it. If you don’t have a convenient gold vacuum such as a Vac Pac, try scraping the moss into a bucket. Then break it up to release the dirt from the roots. Once you work the dirt and sand out of the moss, pan that material. Depending on the number of rocks located along any given waterway, you may find plenty of moss to work in addition to sluicing or panning in that river. Give it a try. You may just recover some of that elusive gold that would ordinarily gets overlooked by most prospectors. Good luck! Monday, January 20 2020
The 2020 GPAA Gold & Treasure Show circuit is planned to be better than ever this year! With $110,000 in prizes, several dozen vendors demonstrating equipment, informative Saturday show hours 10 am - 5 pm and Sundays 10 am - 4 pm in these cities: • Pomona, CA: February 15-16 Visit the GPAA website or their Facebook page for more details and to buy your advance $5 adult tickets; kids 12 and under plus military and veterans with ID are FREE. General admission at the door is $10. If you can, make a family road trip out of attending one or more of the shows this spring. In addition to the show itself, each city has fun touristy things to do, and if you're a GPAA member, you can prospect on nearby mining claims. Whether you’re a family with kids or a lone enthusiast, a GPAA Gold & Treasure Show is your one-stop-shop for all of your gold prospecting and treasure hunting wants and needs. By attending a show, you're sure to have a blast, meet interesting people, find new tools, and learn new tricks of the trade. All of that is enough to make you hollar Eureka! Monday, December 23 2019
Did you know that “bad” weather can be a plus for prospectors? No one ever hopes that Mother Nature causes catastrophic loss of life and property, but the ups and downs of weather events in any gold-bearing area are something to take advantage of. Nature can help all of us in our quest for the shiny stuff! Typical winter storms usually do not create enough havoc to force substantial amounts of "new" gold into movement. However, when Mother Nature really goes to work over a “bad” winter or for an extended period of time, a great deal of gold can be set free, creating a bonanza for gold hunters in spring and summer. Gold veins that have been hidden for decades suddenly can be exposed. Floods can also sweep gold out of abandoned mines and wash it downriver. Known gold digs can be washed out, trees uprooted, and the landscape eroded. Benched gold deposits can be released and transported back into running streams. If you’re in an area that experiences high-water events, get out and keep an eye on the water flow so you can try to figure out where the gold actually drops out. Watch the flow lines around boulders and trees. Watch where the flows slow down. The rule of thumb — gold is in the inside bend where water is slowest — is a rule of thumb, but not always 100% accurate. On the flip side, if drought conditions prevailed last fall and continue this winter, adequate water levels needed for panning and sluicing may be difficult to find. By knowing this ahead of time, you won’t waste your time. You can plan to travel to better areas in the coming months. Water isn’t the only force that can work in a treasure hunter’s favor. If you are a detectorist, keep an eye on the wind. Downslope winds can strip and scrub away a great deal of surface material. This wind-driven movement of top sands can make an exciting difference— areas that came up empty just last year may suddenly be productive for a metal detector! Whether you’re in the midwest, southeast, or way out west, water table elevations and annual precipitation can have a significant impact on the amount of gold exposed in waterways, which can affect the probability of what you’ll find in your pan. Greater than average winter precipitation may swell waterways, liberating trace gold previously stranded in ground by droughts of late summer and early autumn. Good luck and be safe! Sunday, November 24 2019
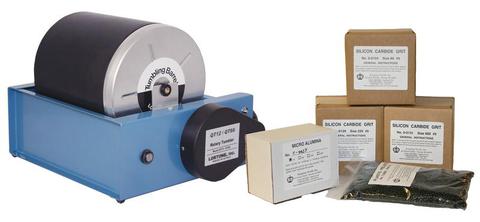
A rotary rock tumbler is the most popular and least expensive type on the market today. It has a system of durable rubber barrels that rotate around a metal cylinder to tumble and polish the rocks inside. They are easy to use and create smooth, polished stones in 4-6 weeks. Finished rocks will have a rounded shape regardless of what they looked like when you started. Some models have multiple barrels so you can tumble two different types of rock, or process two batches at different stages of the tumbling process. The opposite type is called a vibrating rock tumbler.
Monday, November 04 2019
Ground cuts are basically the trenches in the ground from which ground sluicing gets its name. These narrow trenches carried the water and gravels to the sluice box, and sometimes they were the sluice boxes themselves. Sometimes gold that escaped the sluice box is left within these cuts. Stacked rocks. In narrow and steep locations there was little room for the miners to move the rocks away. Instead, miners of yesteryear were forced to stack the rocks into walls alongside the stream where they were working. Sometimes unworked gravels lie underneath these stacked rock walls. Keep an eye out for situations where these walls sit on gravel and not on the bedrock itself. Piles of rocks. In many locations the gravels contain rocks that are too large to pass through the sluice. These big rocks and large cobbles are tossed into piles. The bedrock between them can be very productive, and if they are not too large and deep, you will find that the bedrock underneath them is often productive. It is worthwhile to roll the rocks aside and check out what is underneath. Areas stripped of ground cover and top soils were often left behind as the mining operations processed these materials for their gold content. Sometimes tiny nuggets will get caught in the rough surface of the bedrock and this can be prime territory for metal detectors designed for nugget hunting. Ponds and dams. Small-scale ground sluice operations and even larger hydraulic mining operations simply could not afford to bring water from long distances, so they built ponds close by to hold their water above the workings. When you find them, check out the nearby placer workings. Drywasher piles. In the desert where sluicing was not possible, dry washers were used to process the gravels. These leave distinctive piles of coarse and fine screened materials that are right next to each other. Dry washers are not as efficient as wet sluice operations, so check these piles for nuggets that might have been missed. Hydraulic Mine Workings. When the old miners found large deposits of gravel caused by erosion, they would dig trenches to bring nearby water to the gravel and use the water pressure to wash away the gravels. Check any exposed bedrock very thoroughly because they frequently missed narrow fissures and cracks that can hold nuggets. Exposed bedrock in and around old workings is always worth checking out. Although this is not a complete list, it may provide clues about where to look for gold that you may not have considered. To avoid disappointment, remember that an indicator in one location may not hold true in another location. For example, visible vein quartz on the ground is a valuable indicator in some districts, yet you might find a spot where there is so much vein quartz scattered everywhere that it becomes worthless when trying to pinpoint gold. Other places that have good gold might be completely devoid of any visible vein quartz. One of the great secrets of successful prospectors is that they get out into the field often and work hard at searching. Your mining equipment will not find any gold while stored in your house or garage. Get yourself out in the field as often as possible and enjoy it to the fullest! Tuesday, August 13 2019
The type of stones you use for rock tumbling is largely personal preference. But whether you collect Any rock with a hardness of 5-7 on the Mohs hardness scale will generally take a nice polish in a rock tumbler. Agates have a hardness of 7. Harder rocks usually result in a high-gloss finish. Softer rocks will get smooth and rounded, but they won't take a polish. If the rock looks earthy, it will generally still look earthy when you take it out of the tumbler. Mohs Hardness Scale is named after its inventor, Friedrich Mohs, a German mineralogist. The scale was developed in 1812. He selected 10 mineral To start, fill the rock tumbler barrel between 2/3 and 3/4 full. Choose rocks of varying sizes, as this will promote thorough tumbling action. A batch of rocks that are all about the same size will often not tumble properly or grind very slowly. For a 3 pound barrel, a good range of sizes is from .25 inch to 1.5 inches. Lortone Rock Tumblers found here. If you don't happen to live where agates can be found in stream beds or where quartz pebbles can be found along beaches, that's OK. You can still enjoy tumbling rocks by purchasing the rough materials online. Although it's fun to collect your own rocks, it is often much more economical to purchase them. And remember that collecting on private property without permission is unlawful and that removing rocks from parks and most other types of public land is also illegal. Rocks NOT to Tumble It's just as important to know what type of rocks you should NOT tumble, as it is to know which ones with produce nice round and shiny gemstones. Sedimentary rocks such as sandstone, coal, limestone and shale are too soft or poorly cemented to polish into shiny gems. Metamorphic rocks that contain micas or have a "grainy" texture are also unsuitable - they will break up instead of becoming smooth. And, most igneous rocks do not tumble well because they contain several different minerals that wear down at very different rates. Nugget of News Blog Sunday, July 14 2019
Alluvial gold refers to tiny gold flakes that come to be through water erosion and movement. In geology, alluvium The alluvial environment is a very complex one, with many natural forces competing with each other. The forces that lay down gold are a summation of many flood water events of varying intensity that cause the reworking of sands and gravels. Between major flood events, water naturally flows along the already created path and typically the gold present in the gravel or on the surface will not move much. But the larger flooding events can change the drainage routes and even the river’s shape. Some curves can be shut off from the stream and bypassed. Where the water speed decreases, gravels will drop out of suspension, creating alluvial pay streaks that are typically located along and near the riverbed. To identify where a pay streak might be located, take the flow of the waterway into consideration. The most productive streaks are formed as a result of major floods that are significant in terms of both water flow and intensity of erosion. Greater amounts of gold are present here as compared to regular gravels. Pay streaks tend to possess a comet-like form. At the “head” or “heart” is found the richest concentration of gold. At this location, the gravel is coarser and the sandy and silty fraction is much less. This little bit of silt is present only for a few centimeters on the surface, laid down in the last phases of the flood as the silt is dropped. The gold in these gravels is typically small flat flakes, with maybe a small picker or two. As gold prospectors, our objective is to learn to read a stream and recognize the pay streaks it contains. Think about where you are going to dig before you start and then repeatedly test the gravel you are processing. It is important to consider the presence, form, and depth of the bedrock on which the water and all the alluvial gravel deposits are sitting. In many cases, the gold will naturally concentrate in the lowest part of the riverbed, making a gold-rich path. During high water events, much of the gold is picked up and put back into motion, which leads to forming new pay streaks. Some will be laid back down along the low line of the stream, but may also end up a little farther downstream. The gravels in contact with the bedrock or false bedrock base are often the richest. The same facts apply to the alluvial pay streaks that are formed on gravel bars— the lowest level of the gold-bearing gravel is normally the richest. The alluvial environment changes over time. Alluvial pay streaks generated 100 years ago could become buried, then subsequently be eroded and exposed again. The erosion might be in part or in total, generating a new series of paystreaks further downstream. Pay particular attention to large boulders and trees. Obstacles like these may partially block the water flow and provide an opportunity for increased gold concentrations, especially behind the obstructions. If there are fissures, holes or natural traps in the stream, be sure to sample these areas, too. Although high water events are sporadic, when you do find a paystreak caused by one, it can be a very productive spot. Stick with it and keep in mind most are small and narrow and best worked by hand with a sluice and gold pans. Nugget of News Blog Tuesday, March 26 2019
For nearly a decade, those of us who admit to watching TV reality shows related to gold mining have been With so much scenic footage of places like Scribner Creek, Eureka Creek, and the Bering Sea, it can almost feel like you’ve been there even though the probability of going to Yukon or Nome is as remote as the actual locations. Reality television is a compelling and very influential form of entertainment. It shows real people, real experiences (with some “Hollywood” thrown in) and we somehow relate to them, especially to the “stars” you either love or love to hate. The challenges of inter-miner-relationships that unfold in front of the viewing public can remind you of your own family dynamics, too. But do you actually LEARN anything VALUABLE about gold mining by tuning in? Beyond the entertainment value, the answer is yes! Whether gold mining is the way you make your living or more of a hobby, there are many similarities between small scale and large scale operations. Let’s say you go prospecting every Saturday during the summer and have a few nice pieces of equipment and accessories that you haul in your truck. Whether you head for public land or a private claim, you know there are no guarantees. You do some research, set up your sluice, shovel the dirt, put in the hours, but some days you just don’t find gold, or perhaps not enough to pay for your gas and other expenses. Parker and Tony and Rick and other reality show stars are pretty much doing the same, except on a larger scale. Instead of a shovel, they use a D10 dozer. We see their big machines constantly breaking down and the bush-fixes they come up with (who knew eggs could help plug a radiator leak!). In comparison, you’ve probably struggled with the pitch on your highbanker, and had to rely on duct tape a time or two! Instead of a Gold Cube or spiral panner, these TV mine bosses use huge shaker tables to recover their gold. Instead of several hours, they wait several days to do a clean-up and are often still disappointed in the results. In other episodes they're elated and cheering at their success, just like we all do when we find a gold nugget! Perhaps one important lesson we can take away from these TV shows is about pivoting. If the ground or stream you’re working doesn’t produce, despite the time and trouble you’ve already invested, re-think your strategy. Maybe you’ll have 10 different ideas or locations, but only one of them will really work. That’s OK. Be willing to change your technique or the matting in the bottom of the sluice or try a different piece of equipment than what you’d normally use. Gold mining is a challenge, but as long as you’re reasonable with your expenditures and your expectations, it’s a heck of a lot of fun in the great outdoors. And it also gets you off the couch… just remember to record those reality shows so you can watch them at a later date when you’re not out in the gold fields "making it happening" as Tony Beets likes to say! Good luck! Nugget of News Blog Friday, February 01 2019
Did you know... there is actually more gold still out there waiting to be found today than the old-timers ever
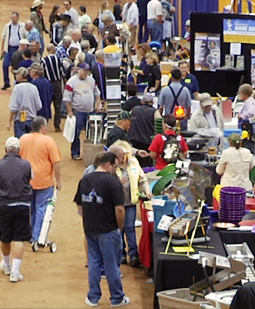 recovered way back in the 1800s gold rush era? And did you also know that attending a GPAA Gold and Treasure Show (Gold Prospector's Association of America) is a great place to get started on your modern day treasure hunt?! recovered way back in the 1800s gold rush era? And did you also know that attending a GPAA Gold and Treasure Show (Gold Prospector's Association of America) is a great place to get started on your modern day treasure hunt?!Browse the show floor to find dozens of leading worldwide manufactures and local vendors demonstrating the latest and greatest gold mining and metal detecting equipment, attend free seminars, ask questions of the pros, and enter to win thousands of dollars in door prizes. Pick up a pan for the first time or hone your skills at the panning zone, where skilled instructors will help you recover gold, for free. Keep all the gold you find!
Saturday show hours 10 am - 5 pm and Sundays 10 am - 4 pm in these cities:
Visit the GPAA website for more details and to buy your $5 adult tickets; kids 12 and under plus military and veterans with ID are FREE. If you can, make a family road trip out of attending one or more of the shows this spring. In addition to the show itself, each city has fun touristy things to do, and if you're a GPAA member, you can visit nearby mining claims.
Whether you’re a family with kids or a lone enthusiast, a GPAA Gold & Treasure Show is your one-stop-shop for all of your gold prospecting and treasure hunting wants and needs. By attending a show, you're sure to have a blast, meet interesting people, find new tools, and learn new tricks of the trade. All of that is enough to make you hollar Eureka!
Nugget of News Blog Sunday, December 30 2018
When prospecting an area that’s known for gold, put yourself in the boots of the old-timers who came before to Host rock (or bedrock) could be shale, diorite, granite, quartz, clay or other material. Keep an eye out for changes in the area’s host rock and notice the direction in which it’s running. Contact zones occur when a rock or mineral cuts or crosses the host rock. Generally, gold is deposited along contact zones, which can be a few inches or several hundred feet wide. If bedrock in your area runs north to south and you notice a color change in material that runs east to west, you’ve found a contact zone. Outcroppings are a lump of high ground with weather-worn rocks which are generally rounded and usually situated on ridges, but can be located anywhere. Especially look for iron staining on outcroppings. Ditch lines of yesteryear were generally dug into and run along somewhat level ground. Very close to diggings, especially in hilly or steep terrain, they may have been cut loose to wash downhill. Follow the old water ditches and see where they end up. Exploratory trenches were not used for water but most of the time were deeper and would often circumnavigate a rich area that may be throwing gold from clay lines, pockets, quartz seams and any other local contacts. Trenches were dug simply to expose any contacts that may be present. As a contact was crossed, old-timers checked it out in both directions for values. Rock cairns are piles of rock or stone used for claim corners. Standing high on a slope looking down is a great vantage point from which to spot cairns and other man-made landmarks. By locating a historic claim, you definitely have a great place to begin! |
|
Nugget of News Blog |


 seminars, and 100 feet of gold panning troughs salted with real gold (keep all you find!), you won’t want to miss bringing the family to a weekend show sponsored by Gold Prospectors Association of Amercia. Eleven shows are to be held across the country in 2020.
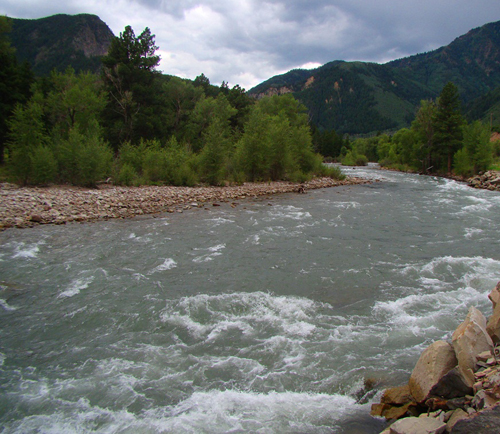
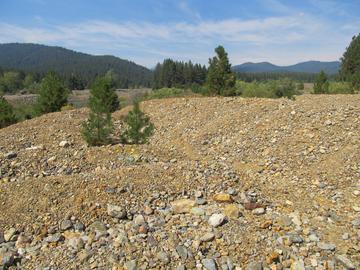 One of the most frequently asked questions has got to be “What signs should I look for when out prospecting that will indicate good gold in the ground?” Unfortunately, there is no simple “one-size-fits-all” answer. Gold occurs in so many different types of deposits, therefore, indicators in one place for one type of deposit don’t always work very well for another. But in general, one of the very best places to look for gold today are in places where old-time miners successfully found it in the past. Sometimes there are very obvious signs of their digging and mining. Old-timers never got all of the gold, and they for sure didn’t have the arsenal of tools and equipment like we have today! The following man-made indicators of previous prospecting might help in your modern-day quest for gold:
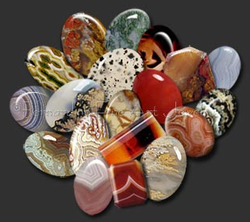 them on your own or buy rough stones, for best results stick to stones of similar hardness but of various sizes when tumbling together. This will ensure they all take approximately the same amount of time to reach the proper smoothness, and that harder stones don't damage softer stones during the tumbling process.
 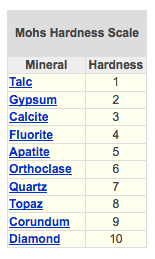 s of distinctly different hardness (hardness is the resistance of a material to being scratched) that ranged from a very soft mineral (talc) to a very hard mineral (diamond). Since you always want to tumble together stones of similar hardness for best results, it's important to understand this principle.
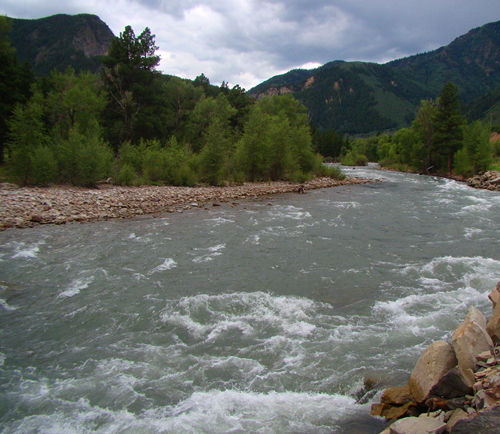 is loose sediment which has been eroded from a primary source, transported and further eroded by water, and redeposited. Since gold is extremely dense, it is easily trapped alongside other dense alluvial particles. The bits of gold found in these deposits of alluvium are called “alluvial gold.”
 enlightened and entertained by Gold Rush, White Water, Bering Sea Gold, Under the Ice, Jungle Gold, and others. And the once-ordinary people we’ve gotten to know from these shows— Todd Hoffman, Parker Schnabel, Rick Ness, Tony Beets, Dakota Fred, Emily Riedel, Shawn Pomrenke to name just a few — became celebrities practically over night. In fact,
 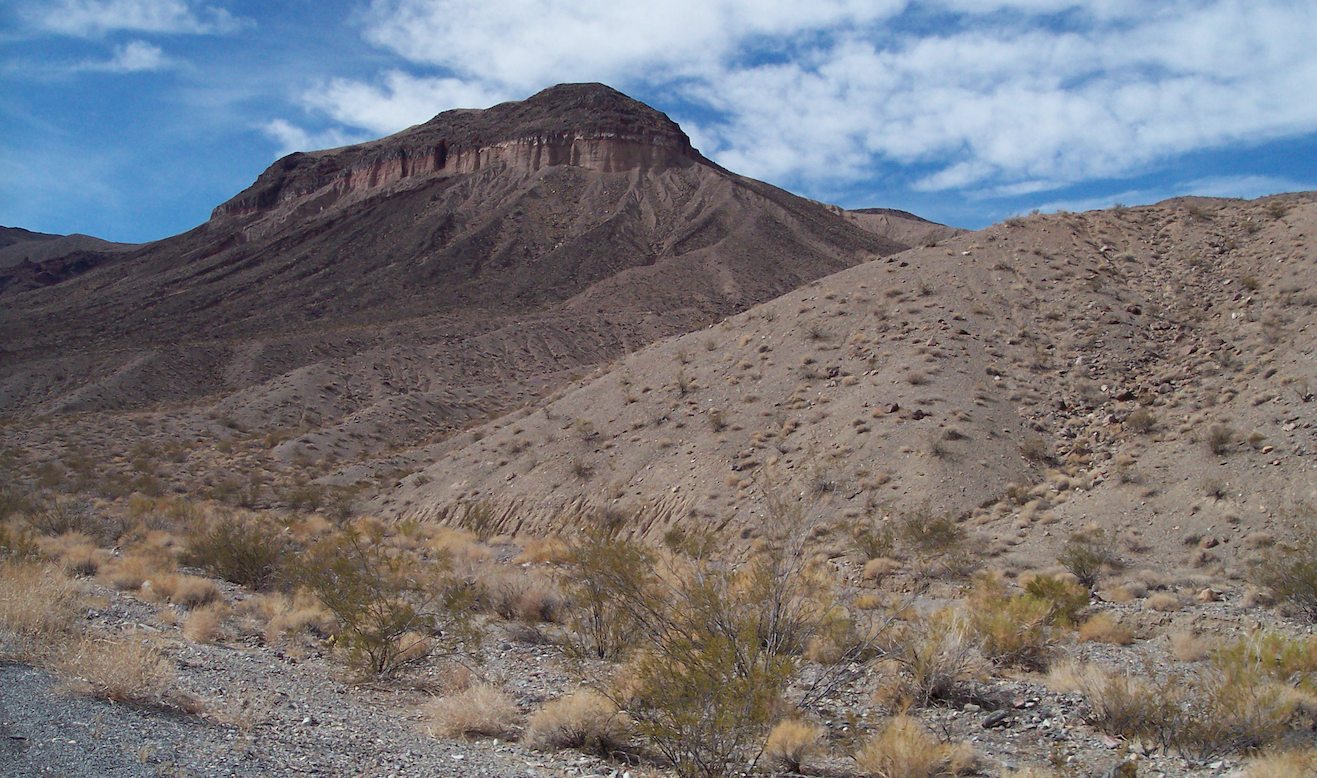 help you decide where to begin. Look at your site from all directions and think about what they could and could not do way back then. Your modern-day equipment and knowledge are a lot more advanced than what they had to work with, so you’re already a step ahead! Many times miners jumped in with both feet and started mining to beat the other guys. But being in a hurry meant they could have missed a lot, or moved on too quickly from their original discovery before it was completely worked out. Considering the lay of the land will reveal important clues that can help you better formulate a plan when you're out in the field. Here’s what to look for: