

Gold Sluicing Techniques and Tips for Better Recovery
Gold concentrations are spotty, even in known gold-bearing areas, so most prospectors sample and test often using a simple gold pan. They keep moving until they get good results. Once you find a spot with a fairly large amount of gravel that yields good gold, then it’s time to bring in a sluice box.

A more traditional 36" metal sluice with riffles, expanded metal and ribbed miner's carpet.
A sluice is relatively simple to operate and has been used around the world for centuries. It is often one of the first larger-scale concentration devices purchased by prospectors. The advantages include relatively low cost, versatility over a wide range of material and water conditions and ease of setup and use.
There are many different types of gold sluices and brands from which to choose. Sluices come in a variety of sizes. Some use a combination of carpeting, miner’s moss, expanded metal, riffles, or specialized matting to recover gold, while others use molded designs instead.
Whichever sluice box you use, the basic sluicing techniques are fairly straightforward, and the open design allows you to see how the material is being processed. As you get started sluicing, or work to improve your technique and results, focus on proper setup, material classification, processing speed and water flow. Small adjustments can make a noticeable difference in gold recovery.
Start With Proper Sluice Setup
Proper setup of your sluice is one of the most important parts of gold separation and recovery. Three key setup factors to pay attention to are:
Set the Sluice Angle Based on Material Movement
Improper sluice angle is probably one of the most common errors gold prospectors make. The old rule of thumb is to set the sluice angle at one inch per foot, but that can sometimes result in too much water velocity and material moving through the box too quickly.
Instead, focus more on how quickly the material is moving through the sluice.
Measure 12 inches down your sluice box and make a mark before heading out to the stream. Feed your material into the sluice using a side-to-side motion. As the material moves through the box, count a slow “one thousand one.” By the end of the count, the material should be passing your mark.
If the material needs to move faster, slightly increase the rear angle. If it needs to move slower, decrease it. The proper angle depends heavily on your classification, so if you change the size of material you are running, you may also need to adjust the angle of your box.
Avoid Too Much Water
Too much water in the sluice is another common mistake. Excessive water depth or velocity can allow fine gold to travel above the area where it should settle.
Running too much water can also create a wider and denser flow of material, making it more difficult for the gold to separate and settle properly.
You need enough water to keep material moving through the box, but not so much that everything is being pushed through too quickly.
Keep the Sluice Level from Side to Side
Horizontal leveling of your sluice is critical to the proper movement of material and the separation of fine gold.
As material travels down the slick plate and through the sluice, you want to use the entire width of the box. If the sluice is tilted to one side, material will concentrate there, leaving one side overloaded while the other side does very little processing.
Make sure the sluice is level from side to side before you begin running material.

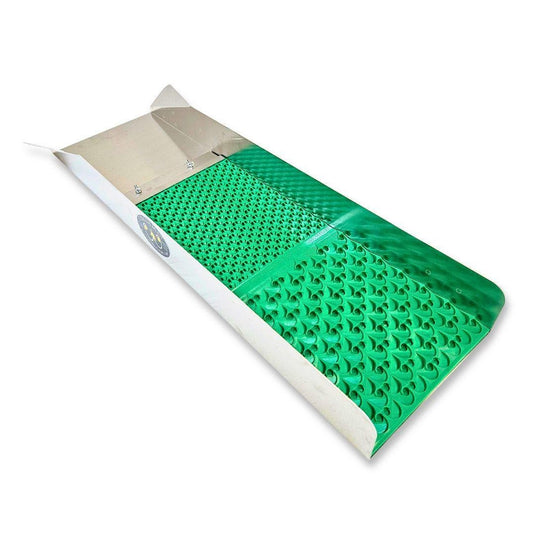
A Le Trap Sluice - Made of high impact ABS plastic. No matting or carpet needed.
Classify Your Material Before Sluicing
Classification means separating larger rocks and gravel from the smaller material you intend to run through the sluice. Matching material classification to your sluice is important for maximizing gold recovery.
First, pan a sample of the material you plan to run through the sluice. This can give you an idea of both the size and quantity of gold in the material.
If you are trying to recover small gold in quantity, finer classification is usually helpful. Although classification takes additional time, it removes larger material that does not need to pass through the sluice and allows the remaining material to run more consistently.
Feed Material at the Right Rate
The processing speed and volume of material you put into the sluice must be matched to the volume and velocity of the water.
If too much material is introduced into the flow at once, the water velocity can slow down and the sluice may begin to back up. This can reduce separation and potentially cause gold to be carried farther down the box.
It is usually better to gradually add smaller amounts of material.
If you are adding material with a scoop, avoid dropping a full scoop directly into the sluice like an ice cream scoop. This disrupts the water flow and dumps too much material into one area at once.
Instead, turn the scoop into the flow and gently move it from side to side while allowing the water to pull the material into the sluice.
Adjust Your Sluice to the Water Conditions
When setting up your sluice, you are always somewhat limited by the conditions at hand. However, three major factors are still under your control: water flow, sluice angle, and how quickly you introduce material.
One or more of these may need to be adjusted as conditions change.
When using natural stream flow, you are working with the characteristics of the stream, including water speed, depth, and the available locations where you can place the sluice. A sluice stand can sometimes help you get the angle and water flow you need.
If you are using a power sluice or other pump-fed system, you have much more control over the water flow and sluice angle, making it easier to fine-tune the setup for the material you are processing.
In either case, the proper setup is dictated by the material you are processing and the water conditions available.
A Prospectors Dream 10x35 Sluice Box with Dream Mat.
Know When to Clean Out Your Sluice
Understand your sluice’s capacity and how much heavy material it can hold before it begins to lose its ability to separate material effectively.
If you begin to see heavy material steadily moving farther down the sluice, or previously settled material beginning to move, it may be time to stop and clean out the box.
If you consistently process material containing a large amount of black sand or other heavy concentrates, setting up a regular cleaning schedule can help prevent the sluice from becoming overloaded.
Keep Watching and Adjusting
There is no single perfect sluice configuration that works for every water condition and material type. It is always best to match your sluice setup to the conditions and material at hand.
As you run material, continually watch how the sluice is processing it. Look for good separation, movement of lighter waste material out of the box, and proper settling of heavier material.
These same basic techniques can be used with many different sluice designs and adjusted as stream conditions change throughout the year.
Finding the Right Material Still Matters Most
The real secret of successful prospecting is not only knowing how to operate the equipment but also developing the skill to find the natural places where gold is likely to accumulate.
Learn to read the river or stream and sample promising areas with your gold pan before running large amounts of material.
Inside bends, behind large boulders, around bedrock outcrops and in areas where water velocity changes can all be good places to sample, although there are plenty of other possibilities as well.
The relatively low cost and versatility of sluicing allows you to tailor your equipment and technique to the conditions in your area. Good luck!